![]()
The advantage to making stick pens is that they are quickly and inexpensively made. There are no kit parts required and there is no limit to the creativity that can be incorporated in the turned body. Because it is a spindle turning, beads, coves, captive rings, and other spindle turning adornments are possible. We make and sell these type of stick pens at charity fund raising efforts at the local county fairs and other like events. Being low cost and quick to make allows customers to watch the pen being made and then buy it at a very reasonable price. Obviously, when we do them at the fair we have everything prepped and ready so we only have to do the actual turning itself.
The only need, other than the wood to be used for the body, is the inkfill to be used in the pen. The two most commonly used are the inkfills removed from the Bic “Round Stic” and the Papermate “Write Bros” pens. Both of these makes are available at the discount stationary supply store, Wal-Mart, or equivalent. Purchased in quantity, they are very inexpensive. Both manufacturers offer black and blue ink. Selection of one or other brands needs to made since they are different dimensions and therefore not interchangeable. My choice is the Papermate for two reasons. First, it is a smaller diameter allowing for more freedom with regards to the pen body design. Because the drilled hole is smaller, there is more meat available for the body and more variation possible between the thick and thin sections. Second and more important, the inkfill used in the Papermate pen is shorter than the Bic. This shorter length means that you will have a shorter depth of drilling required. By requiring a shorter drilling, you are more likely to have less drill wandering and more success in making pens without “breakout”. While some cheat by clipping the inkfill length so they don’t have to drill as deeply, I use the inkfills at full length. By using the inkfills in their full length, versus cutting them to make them shorter, you allow the recipient to easily replace the inkfill with a standard inkfill when it runs out someday and you don’t create a potentially messy situation with leaking ink. I select the color inkfill to be used based on the species of wood used. Since the color of plastic left showing using the Papermate inkfill is also the color of the ink, I pick the color that best fits with the color of the wood being used for the pen body.
The pens, both Bic and Papermate, use a friction fit between the inkfill and the molded pen body. There are two easy ways to remove the inkfill. One way is to use a jar lid friction pad to grip the nose end of the inkfill, providing a slip free grip, and simply twist the inkfill while pulling it away from the pen body. This can be done with a finger grip only and doesn’t require pliers or the like. Doing it this way makes no marks on the inkfill. If you do not have an easy time doing it by hand, you can use pliers over the rubber friction pad but take care not to damage or mar the inkfill. It is molded plastic and will show any scarring or squeeze deformation. Another method to separate the inkfill from the pen body is to use a utility knife. Put the blade at the intersection of the pen body and the inkfill and slightly press the blade into that small gap. It will split the two pieces far enough apart to let you easily separate them. If done carefully, there is usually little evidence seen on the inkfill. If you are too aggressive or pry them apart, you usually wind up with a small flat spot on the inkfill edge that can be seen. Once you have separated the inkfill from the pen body, you can throw the plastic pen body away since nobody has found a good use for them yet. At least not in the quantity that we generate when making stick pens. If you think of one, please let me know since it seems like there should be something they can be used for. The pen caps can be saved and used if desired. It is possible to turn your stick pen to the proper dimension so the cap will press on and cover the tip. While it’s pretty unsightly with a colored plastic cap and a nice piece of wood, it makes the pen usable for carrying in a ladies purse. They usually won’t put an uncapped pen into their purse and have it poking other contents.
You can use any type of wood (plastic or whatever you care to turn) that you wish. If you are using wood, select something that has some character and attention getting. The domestic woods are usually too plain to be eye-catching and don’t sell very well. An exotic wood with some wild grain or color can be used to make a very attractive and eye-catching pen. The quantity of wood is small so cost isn’t usually a factor. Since most stick pens are done in a desk pen length, most people cut their own stock to their own desired dimension rather than buying pre-cut pen blanks. The pre-cut pen blanks are usually too short and they are a bit pricey compared to having a plank of the desired species and cutting your own.
The thickness of the pen blank can be whatever you desire. Remember that the minimum thickness of your pen blank will be your maximum diameter possible, before accounting for off center drilling or drill wandering. You will do well to start with stock erring on the thicker side until you develop a knack for it. The length of the blank can be as desired. Again, you need sufficient length to mount and hold the stock as well as provide enough material for the desired length. It’s easier to waste a bit of stock by turning off an excess than it is to skin your knuckles by working too close to the chuck. When cutting your stock, make your width the same as your thickness so you blank is sort of square. This will make holding and drilling easier.
At this point you have pen blanks in a species you wish, that are long enough to work with, and are reasonably square. Depending on which manufacturer you selected, you’ll need the drill sized for the friction fit part of the inkfill. Since these are molded parts and they do vary slightly lot to lot, you’ll do well to use a pair of dial calipers or micrometer to measure the diameter needed. It is easiest to make one drilling rather than a small diameter for the ink reservoir and a larger one as needed for the friction fit portion of the inkfill. The sizing is important since the wood will be very thin at the press in area and will split easily. It is best to size your drill for a best fit and then do one of two things later. You can open up the entry hole slightly with a rat-tail file to allow for less of a press fit. You can also get a tighter fit by scoring the plastic on the inkfill in the press fit area. A slight scoring around the diameter of the inkfill in the press fit area with a utility knife will raise enough flash to provide a tighter fit should you drill a bit too large. Having the calipers or micrometer allows you to measure the actual dimension on the inkfill and the actual dimension of the drill. What’s marked on the index only means what they intended the size to be. How close they actually came is a different matter. You will need a drill long enough to make the drilling to at least the proper depth plus some cushion. You will only be drilling from one side so you will probably need to buy long length drills. A local industrial supply house can provide you with longer drill lengths or you can order them from MSC, Enco, or other mail order tool supply companies.
The actual drilling can be done in a drill press but there are two problems doing it this way. The stroke on the quill will probably be too short. You will have to drill to its maximum depth of stroke and then re-adjust the table or use a step block to raise your stock. Either way is a pain and not conducive to accuracy. The blank is also hard to hold accurately and there is a tendency for the drill to wander as it encounters various grain patterns or hardness variations. I have found that drilling the blanks in the lathe provides better results. You will still need a drill that is long enough to make the required depth in one pass. Hold the blank in a four-jaw chuck (spigot jaws work nicely) in the headstock. Use a Jacobs’s chuck in the tailstock with the proper sized drill. You will need to relocate the tailstock to continue drilling when you reach the end of extension of your tailstock feed. While this is the same problem that you would have faced on the drill press, you have the advantage of the stock being held well and the ways of the lathe to accurately control the tailstock alignment. Drill to the required depth plus allow for some cushion. Remember, you may need to do a bit of work on the nose of the pen so any stock removed will make the inkfill sit deeper. Having a bit of cushion is much better than trying to drill deeper when the pen is finished or being forced to nip the end of the ink reservoir to get it to fit. Once the hole is drilled, repeat for the balance of your pen blank stock since you are already setup. I check the depth and fit of each blank with an actual inkfill to make sure I am deep enough and to test for the “fit”. Now is the time to know if the press is too tight rather than after you split the pen once it’s done and much thinner material. If it’s too tight, perhaps a different drill is in order. At least for the first inch or so. Often the same sized drill from a different index or different manufacturer varies enough in its tolerance to make a proper fit. There also is some variation on how accurate the finished hole will be based on the species. Some will wind up tighter than the drill dimension and some will be looser. Once you have a comfortable slip fit, you are ready for turning. The interference fit needs to only keep the inkfill from slipping out. There will be force trying to pull it out in use so it need not be very tight.
Depending on how serious you are about making these style of pen, you may want to make up a few turning jigs to help yourself. The simplest way to turn these pens is to make a drive fixture. Get a piece of drill rod that is the same diameter as you inkfill drill size. The length needs to be longer than the drill depth by a couple of inches. You put some teeth on both ends of the drill rod. Use a Dremel tool with a grinding wheel or cutoff wheel. You can also use your bench grinder if necessary. You are trying to replicate, in function, the spurs on the end of the traditional drive center. You don’t really need a 4-spur drive. A two-spur drive will work nicely. Any “teeth” you can impart to the drill rod ends will help drive the pen blank. This will be a mandrel for the pen blank to be turned on. You will use a Jacobs’s chuck in the headstock with the drill rod mounted in it sticking out slightly farther than the depth of the hole in the pen blank. The pen blank will be slid over the drill rod and the tail center brought up to hold the blank in place and pressured against the teeth in the end of the drill rod. This will provide the drive for the blank while you are turning it. The reason you prepped both ends of the drill rod is so that you don’t care which way you install it in the chuck and you have a “fresh” set of teeth ready to use on the other end some day down the road. The beauty of this type of drive mechanism is that the blank runs on the hole as drilled and not with respect to the outside surfaces of the blank. Therefore, any wandering of the drilled hole is accounted and compensated for.
Actual use is pretty simple. Install the Jacobs chuck in the headstock and insert the drill rod drive mandrel. You want the pen blank end to be close to the chuck while you are turning but not too close. You’ll want some room to work on the end of the pen blank so insert the drill rod to the desired depth and tighten the chuck. Hopefully, the drill rod will run pretty true on the lathe. Errors in the alignment and accuracy of the chuck and the drill rod straightness are amplified by the time you reach the far end of the mandrel. If the mandrel doesn’t run very true, you may wish to realign it, straighten it, or do something to make it run as true as possible. When you are happy with the mandrel alignment, slide the pen blank onto the mandrel until it seats in the bottom of the hole. Turn on the lathe at a slow rpm so that mandrel and blank are spinning while you bring up and tighten the tail center. This allows the blank to spin on whatever center it wants rather than you forcing it to be on the center you think it should be. With the tailstock up tight enough to hold the blank on the drive spurs at the bottom of the hole, turn your desired pen shape. It needs to be long enough that the top end of the pen is solid wood so I usually mark the approximate end of the inkfill location. This lets me style and shape based on that minimum length. Turn the pen leaving sufficient material at the top end so the tail stock can still support the pen and the pressure required to hold it firmly to the drive teeth. After turning, sand, and then finish your pen. I usually use a skew to part off the far end so there is a nice surface to a point at the top end of the pen. The excess that is cut away just falls off as you finish cutting through with the skew.
There are other ways of holding the pen blank for turning. I use a chuck with spigot jaws at the headstock end to grip the undrilled end of the pen blank. I can then rely on that for the turning force and bring the tailstock with a wide-angle cone up to the drilled hole. Since all of the drive is provided by the grip of the chuck, the tail center only needs to be lightly in place to support the back end. This light force shouldn’t split the pen as you thin the walls. The disadvantage of this method is that the headstock end of the wood isn’t centered according to your drilled hole. It’s aligned based on the outside square of the stock. If there is drill wander or inaccuracy in the drilled hole, this method makes no compensation for it at the headstock end. It does center based on the drilled hole at the tailstock end. Another method of holding is to use the Morse taper. The old hands used to size the end of their stock so they could drive it into the Morse taper for support and drive. You still use the tailstock for support and alignment by locating light pressure into the drilled hole. I do enough of these that I have a tail cone that is sized for the drilled opening and a shoulder with the desired OD to fit the inkfill’s shoulder OD. This allows for good alignment and support and a sizing bushing as well. I am sure you can think of other methods in addition to these.
Once the pen body is completed, assemble the pen by pressing the inkfill into the new pen body until the inkfill shoulder presses against the pen body. If the fit is too tight, STOP. The pen’s wooden sidewalls will split easily because they are pretty thin at that point. Open the hole up by using a small rat-tail file. It only needs to be opened for about an inch. You can also use a slightly larger drill bit, held in a tap handle, to open up that short length. Turning it by hand with the tap handle with a slightly larger drill works the best for me. If the hole is too loose, you can do the scoring with a knife as mentioned. Using a utility knife on the friction fit plastic portion of the inkfill will raise sufficient material to tighten a slightly loose fit. It you have more than that to fill, a piece of scotch tape wrapped around that interference fit area will tighten it up.
One of the things to make sure to do is to show the recipient how to remove the current inkfill and replace it when it becomes necessary. Most people are so tickled to have a custom made pen that they will use it for years. Once they know how to obtain and install another inkfill, the pen’s lifetime becomes almost indefinite.
|
|
|
|
|
|
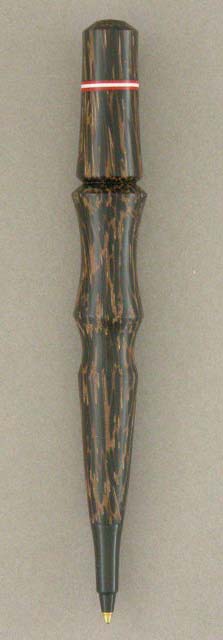
A pen done in Black Palm with some color cardboard inserts |
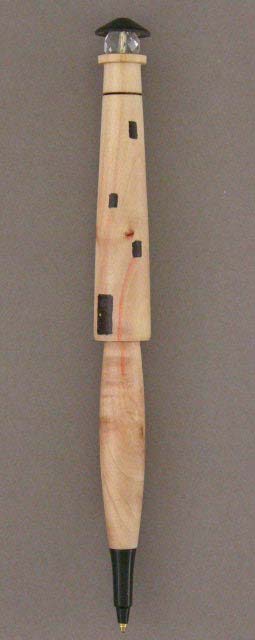
A stick pen done with a clear crystal and "roof", marked with magic marker to appear as a lighthouse |
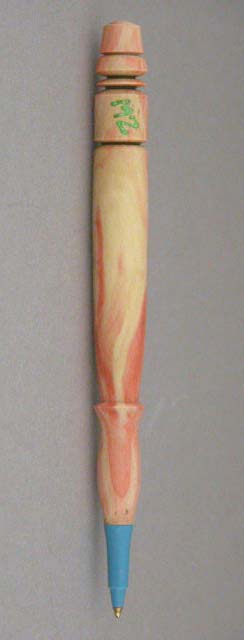
A Box Elder pen with crushed stone inlay for the owners initials |
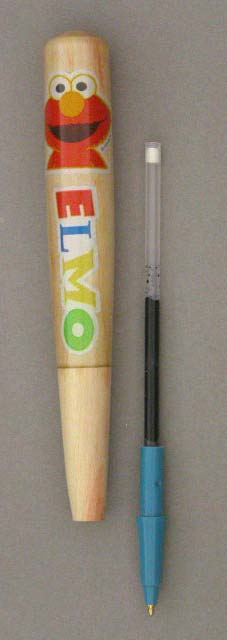
A pen done with Elmo stickers under polyester resin |
The limit is your imagination using a piece of wood and an inexpensive pen inkfill |
Photos by Kurt Hertzog |